Step 1: Access Your VPS Server
Logging into your VPS server is the first step towards installing CWP. You’ll need to use an SSH (Secure Shell) client to access your server remotely. Here’s how you can do it:
- Open your preferred SSH client. For Windows users, PuTTY is a popular choice, while macOS and Linux users can use Terminal.
- Enter the IP address and port number provided by your hosting provider into the SSH client.
- Next, provide your username and password to log in to the server.
Step 2: Download CWP Installation Script
After accessing your server, you need to download the CWP installation script. This script automates the installation process, making it easier for you. Follow these steps to download the script:
- Navigate to the directory where you want to install CWP. You can choose any directory you prefer.
- Use the
wgetcommand to download the CWP installation script. This command retrieves files from web servers.
Here’s an example of how to download the script:
wget http://centos-webpanel.com/cwp-el7-latestStep 3: Run the Installation Script
Once the CWP installation script is downloaded, you can execute it to start the installation process. Follow these steps to run the script:
- Use the
shcommand followed by the name of the installation script to execute it.
sh cwp-el7-latest- The installation script will guide you through the installation process. You may need to confirm certain actions and provide configuration details during this process.
Step 4: Access CWP Web Interface
After the installation is complete, you can access the CWP web interface using your web browser. Follow these steps to access the interface:
- Open your web browser and enter your server’s IP address followed by
:2030in the address bar. For example,http://your-server-ip:2030. - You will be prompted to log in to the CWP interface using the default username and password provided during the installation process.
Step 5: Initial Configuration
Upon logging in to the CWP interface for the first time, you’ll be guided through the initial setup process. This includes configuring your server settings, creating user accounts, and setting up domain names. Follow the prompts and fill in the required information to complete the setup.
Step 6: Security Considerations
After installing CWP, it’s crucial to implement security measures to protect your server. This may include configuring firewalls, setting up intrusion detection systems, and regularly updating your server software to patch any vulnerabilities.
Step 7: Additional Configuration and Customization
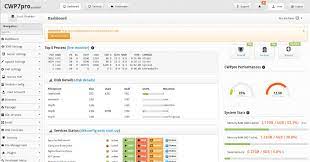
Explore the various features and options available within the CWP dashboard to customize your server environment according to your needs. You can manage services, install applications, configure DNS settings, set up email accounts, and much more through the CWP interface.
Conclusion
Congratulations! You’ve successfully installed Control Web Panel (CWP) on your VPS server. By following these steps, you can now efficiently manage and control your server environment with ease.
Remember to regularly update your server software and implement security best practices to ensure the safety and stability of your VPS server.
(Note: This installation guide assumes you are using a CentOS-based VPS server. If you’re using a different operating system, the installation process may vary. Always refer to the official documentation for specific instructions tailored to your server environment.)

